


A common piece of feedback we receive in early edit rounds is “this video is washed out?” The washed out look is known as LOG. LOG formats are low in contrast and saturation providing detail in the shadows and highlights. Shooting footage in this format provides us the most control over the final look of the video.
LOG is corrected in one of the last steps of our post-production process known as “color grading”. At this stage we enhance the appearance of video by adjusting contrast, color, saturation, shadows, and highlights.

Reasons we choose to shoot LOG:
- Creative choice. By shooting LOG, we can push and pull the image to craft creative looks that enhance the story.
- To match different cameras. Since camera manufactures have different looks, it helps to shoot in a file format that gives us the most data and flexibility to adjust the final image in edit.
- When shooting in environments with a lot of contrast. As mentioned, LOG is our best bet to retain detail in the shadows and the highlights. Shooting in an environment with a lot of both makes LOG a necessity.
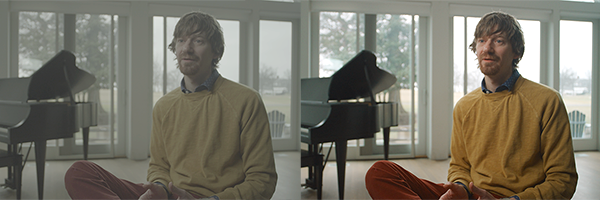 ConcertNova & Response Project "Durations" - LOG (left) and final color (right)
Why is color grading last in our workflow?
We start our video edits in Adobe Premiere Pro. Color is done in an industry leading color grading software known as DaVinci Resolve Studio. When editing in Premiere, a cut is “non-destructive”, meaning nothing actually ends up on the cutting room floor. It’s all preserved and accessible until the very end letting us rearrange or extend edits until final approval.
After we color grade in DaVinci Resolve, the trip back to Premiere is “destructive”. The color is only applied to the final sequence (from the in point of an edit to the out point). Consider an interview video clip. We might record an hour of answers and only select two minutes of talking points to include in the final sequence. DaVinci Resolve will only apply the color to the two minutes of talking points when returning to Premiere for final assembly. Therefore, it’s best practice to receive final approval of the content and edit, commonly referred to as “picture lock”, prior to color grading. The same is true for final audio mixing, which happens concurrent to the color grade.
Steps to the final look.
If you think of adjustments being layers in photoshop, then every adjustment layer is working off of all the previous adjustments. Therefore, you are loosing information with each adjustment. There needs to be a plan. Here's what I consider...
- Primary adjustments to exposure, contrast, and saturation. Converting the LOG image to an accurate representation of contrast and saturation is the first step in the process. It is the first step so we are closest to the final look, but applied last in the chain of edits to come, maintaining the most information provided by LOG for the remaining corrective and creative adjustments. Having this step applied to the start of the edit chain could introduce unwanted noise.
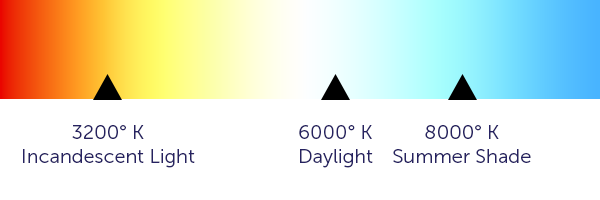
- Adjusting white balance. All light is not created equal. Prior to LEDs, light bulbs comprised of a filament and a gas. Together, they’d produce visible light on a rainbow color spectrum measured in degrees kelvin (X-rays, infrared, etc.. are also measured in degrees kelvin). Warm light measures between 2800° K and 3200° K are favored for home fixtures. White light is associated with day light and measures between 5000° K and 6000° K. Adjusting white balance yields better color across the image, however, some environments contain mixed lighting temperatures. In these cases we adjust to yield the best colors for the subject and use secondary adjustments to finesse the mixed sources.
- Secondary creative adjustments. The imagination is often the limit here, but a few examples could include skin tone adjustments, adding or subtracting saturation from a specific color, altering a hue of a specific color, or pushing complimentary colors into the highlights and shadows.
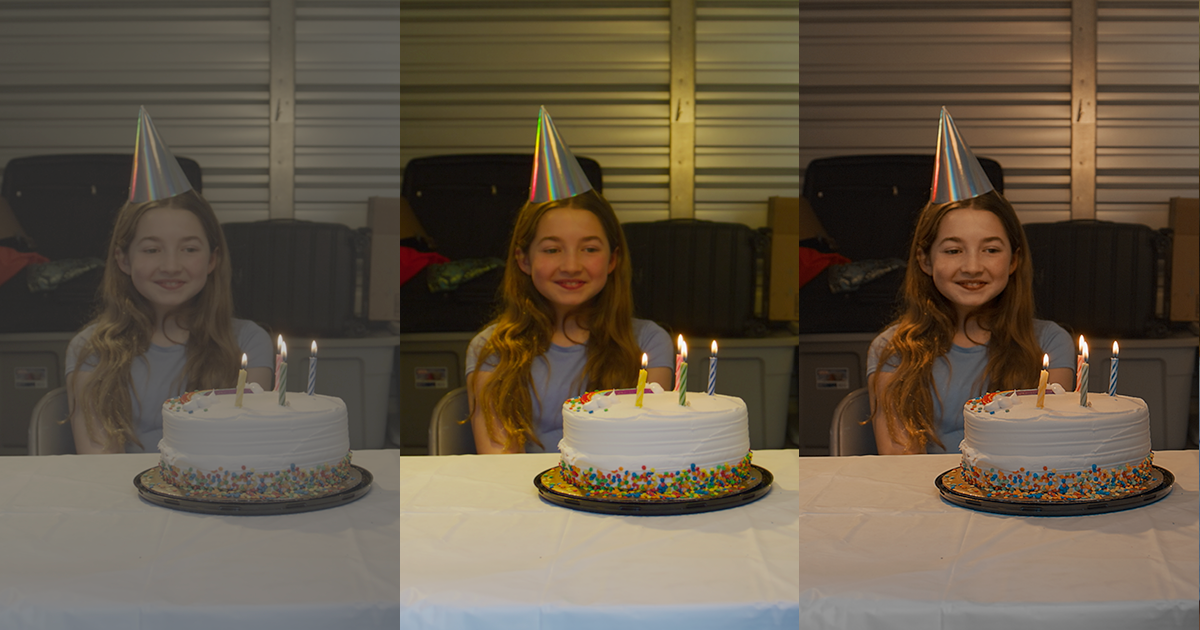
 Welcome House PSA Color Process Example.
Taking these extra steps can dramatically alter the look and feel of a scene. In the PSA we created for Welcome House, a birthday scene unfolds while the viewer learns the mother and her two daughters are living in a storage unit. We pushed warm tones into the scene to aid in the misdirect and imply, despite the hardship, this is a happy scene.
While I could continue to dive into more aspects of color grading, let's conclude the subject for now and chat color on your next Spotted Yeti video project.

Comments
Leave Your Comments